Image filters are the additional makeups given to an image to enhance its appearance and style. In photography, a filter is a camera accessory consisting of an optical filter that can be inserted into the optical path. The filter can be of a square or oblong shape and mounted in a holder accessory, or, more commonly, a glass or plastic disk in a metal or plastic ring frame, which can be screwed into the front of or clipped onto the lens. The majority of filters used with film cameras have been rendered redundant by digital filters applied either in-camera or during post-processing. Exceptions include the ultraviolet (UV) filter typically used to protect the front surface of the lens, the neutral density (ND) filter, the polarizing filter, color-enhancing filters, and the infra-red (IR) filter. The neutral density filter permits effects requiring wide apertures or long exposures to be applied to brightly lit scenes, while the graduated neutral density filter is useful in situations where the scene’s dynamic range exceeds the capability of the sensor. Not using optical filters in front of the lens has the advantage of avoiding the reduction of image quality caused by the presence of an extra optical element in the light path and may be necessary to avoid vignetting when using wide-angle lenses.
There are many apps and websites which provide us with many filters on the go, my top 3 image filtering apps include-
1.INSTAGRAM-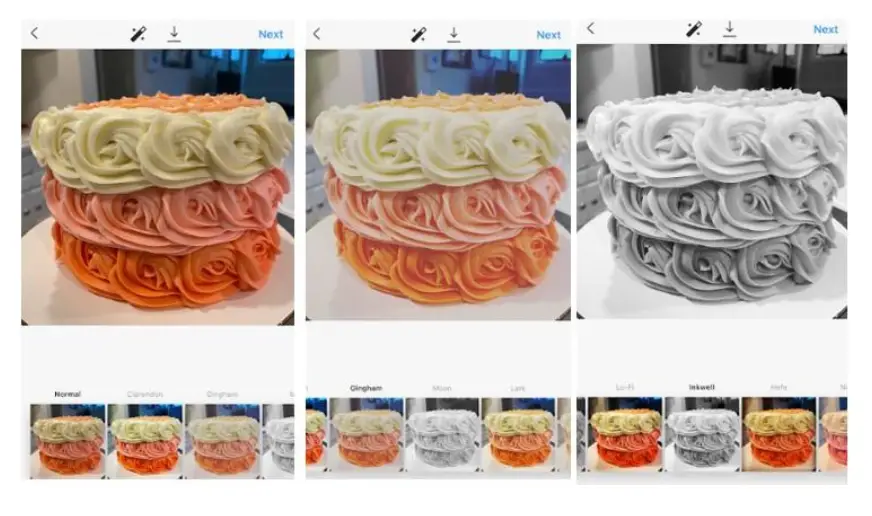
Instagram is a very popular app that is a successor to Facebook. An Instagram filter is a feature within the social platform that allows you to edit your photo with one click, by simply applying pre-set edits to the image that Instagram has created for you. The good old Instagram filter was first launched in 2011 with some simple options to filter your photograph with a higher resolution, an optional border, or some nice tilt-shift effects. While these options may seem basic now, it was a whole new world for individuals lacking photo-editing chops. This feature was initially launched in 2011 as an update but later, it was a world hit update.
2.SNAPCHAT-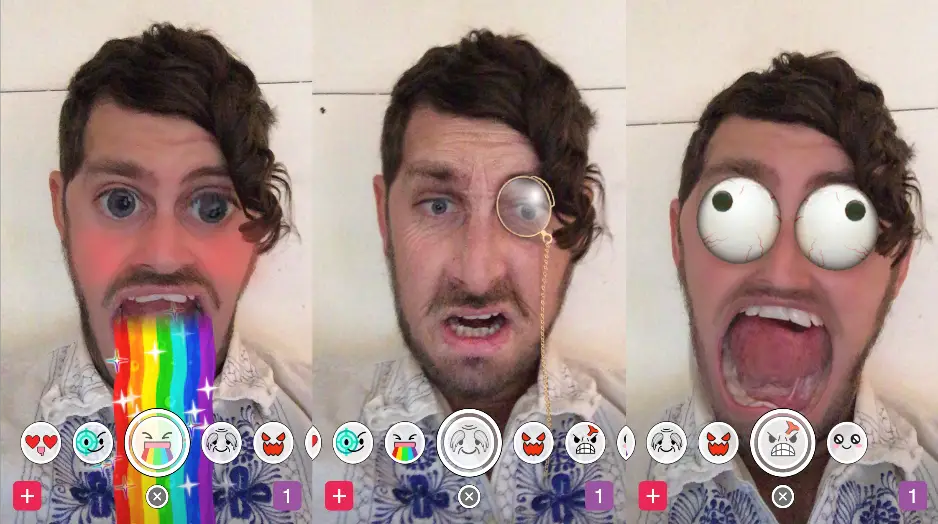
Snapchat is an app where the Snaps can be personalized with various forms of visual effects and stickers. Geofilters are graphical overlays available if the user is within a certain geographical location, such as a city, event, or destination. Users can design and create their geofilters for personal events at a certain cost per hour. Bitmojis are stickers featuring personalized cartoon avatars, which can be used in snaps and messaging. Bitmoji characters can also be used as World Lenses.
3.B612-
B612 is an image enhancing app which is used to take a better picture. There are many images editing options, out of which the major one is the image filter editor. There are many image filters and image add-ons that can be taken advantage of. The traffic of the app is very organic and has increased exponentially. This is an alternate option to stock camera app that is provided on the mobile.
These are my top apps for any image filter options. The filter qualities are awesome and the designs are variant to each other. Adding filters to an image is a very simple task and requires no additional knowledge on anything, now I have written steps on how to add a photo filter to a sample photo, the image editing software I have used is ADOBE SPARK, it is free to use online-based software and although it has a limited filter under unpaid plans, the hands-on experience is very good and the features are very awesome. the following steps can help the user to add a filter to his photo-
1. OPEN THE ADOBE SPARK WEBSITE-

Open your browser and search for the adobe spark website through the search box. There are many features included both paid and free included and related to image editing, audio file editing, and video file enhancement features. Each has its own special features which can be upgraded with a paid version. However, to get the most out of adobe spark we need to log in to access them.
2. SELECT THE ADD PHOTO FILTERS OPTION-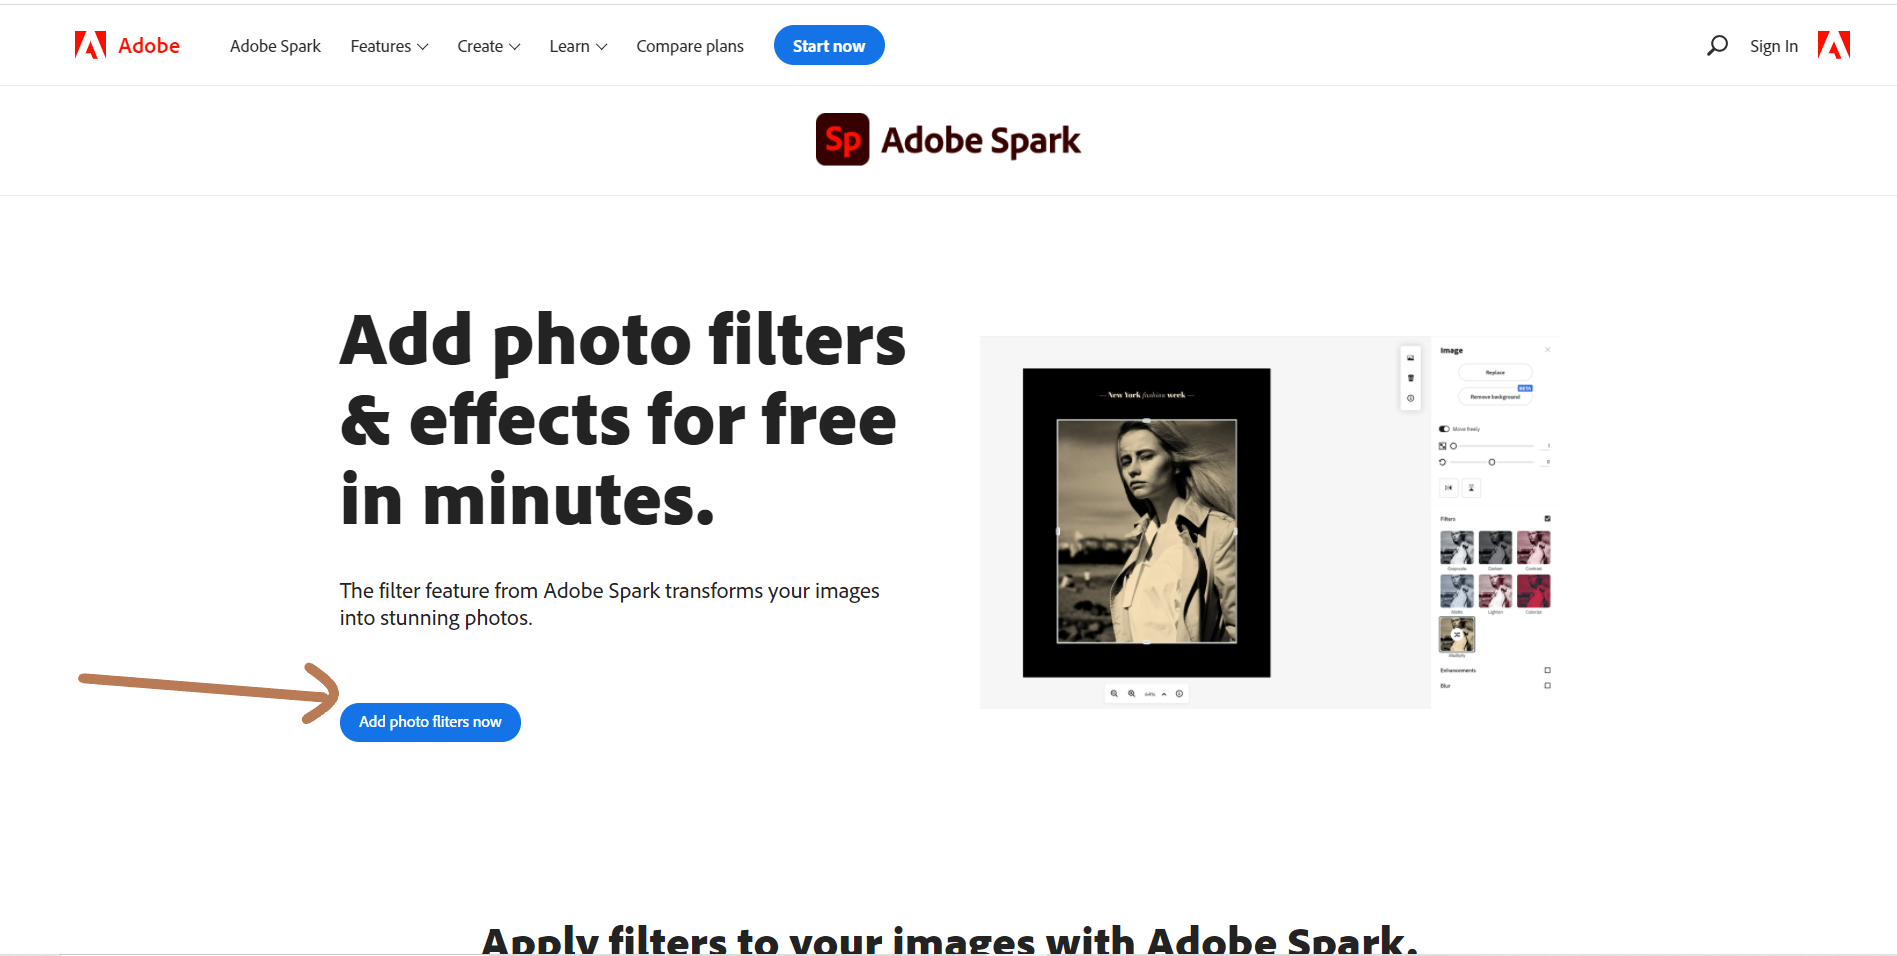
After opening the browser and logging into the website, just search for the add photo filter through the search box. Hit the add photo filter option to access the filter option.
3. Select the frame and border format -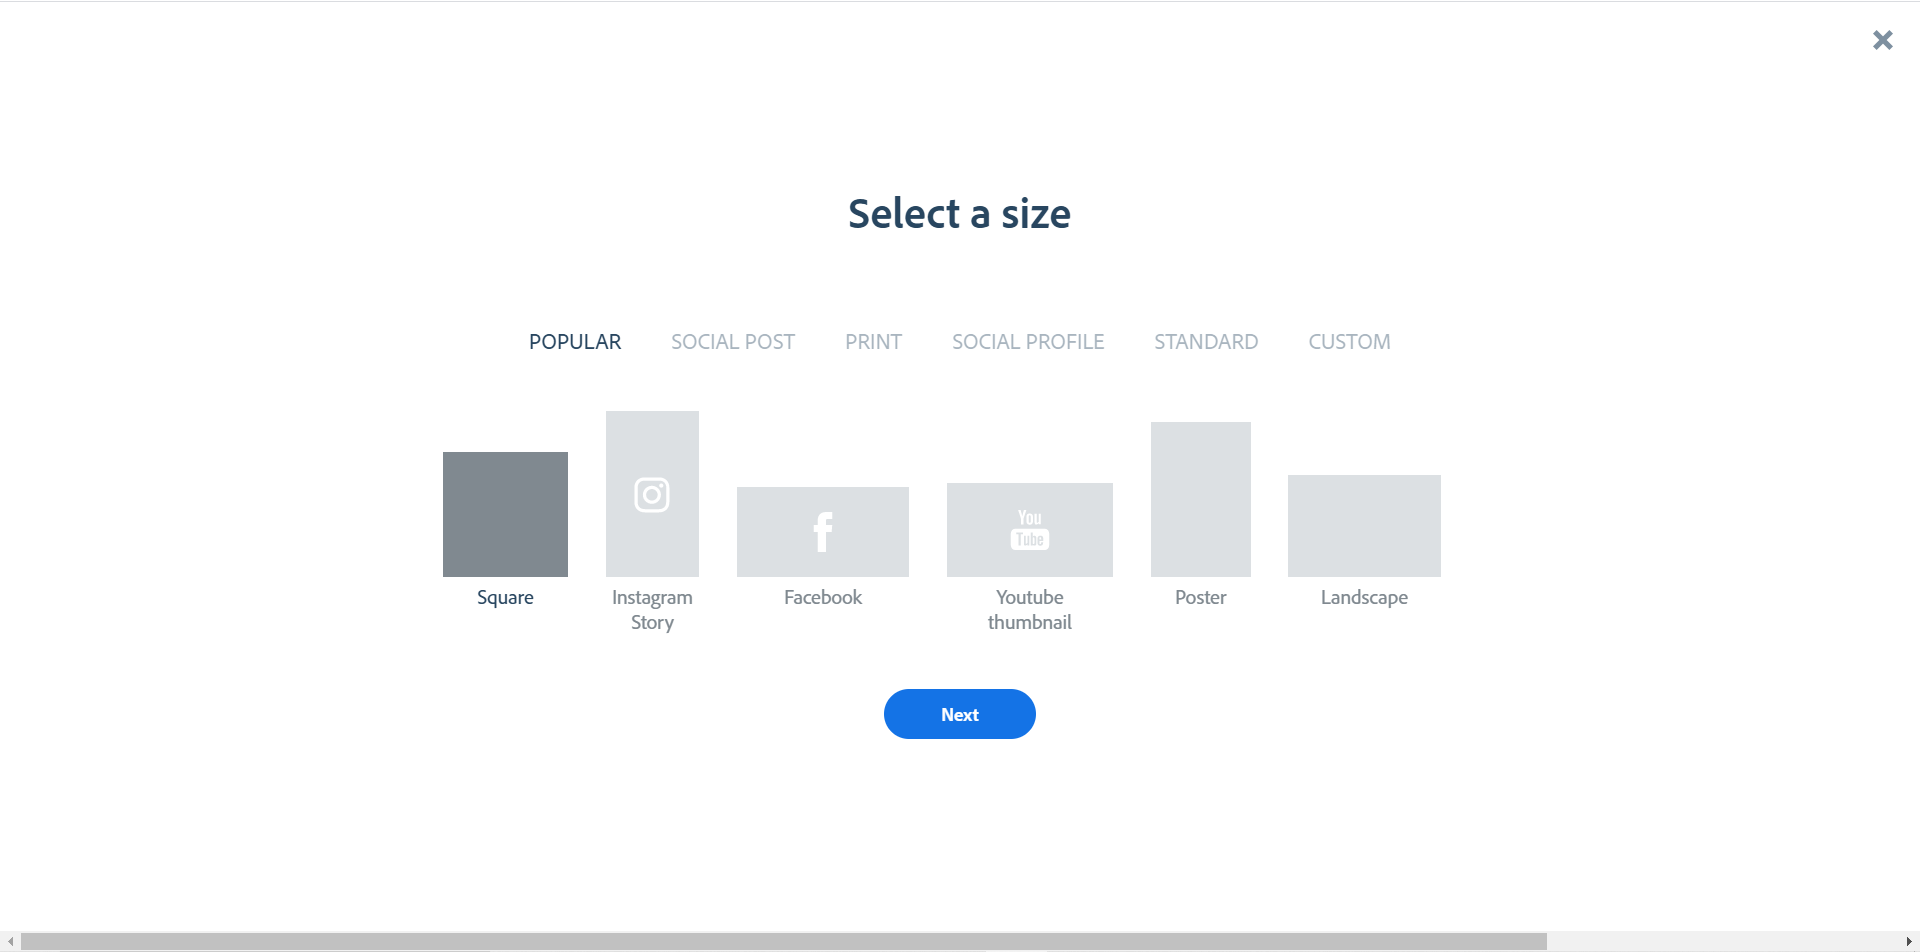
If you are looking to create a perfect filter, you’re just a few steps away from creating one, just select the border which is to be applied to your photo before tagging in a filter to it. The borders are many, each created for its own purpose. May that be an Instagram post or story about your birthday, or be it a Facebook post, YouTube thumbnail, a poster, a landscape you have it all under one web, each occasion has a frame and border for different purpose and application.
4.ARRANGE THE PICTURE-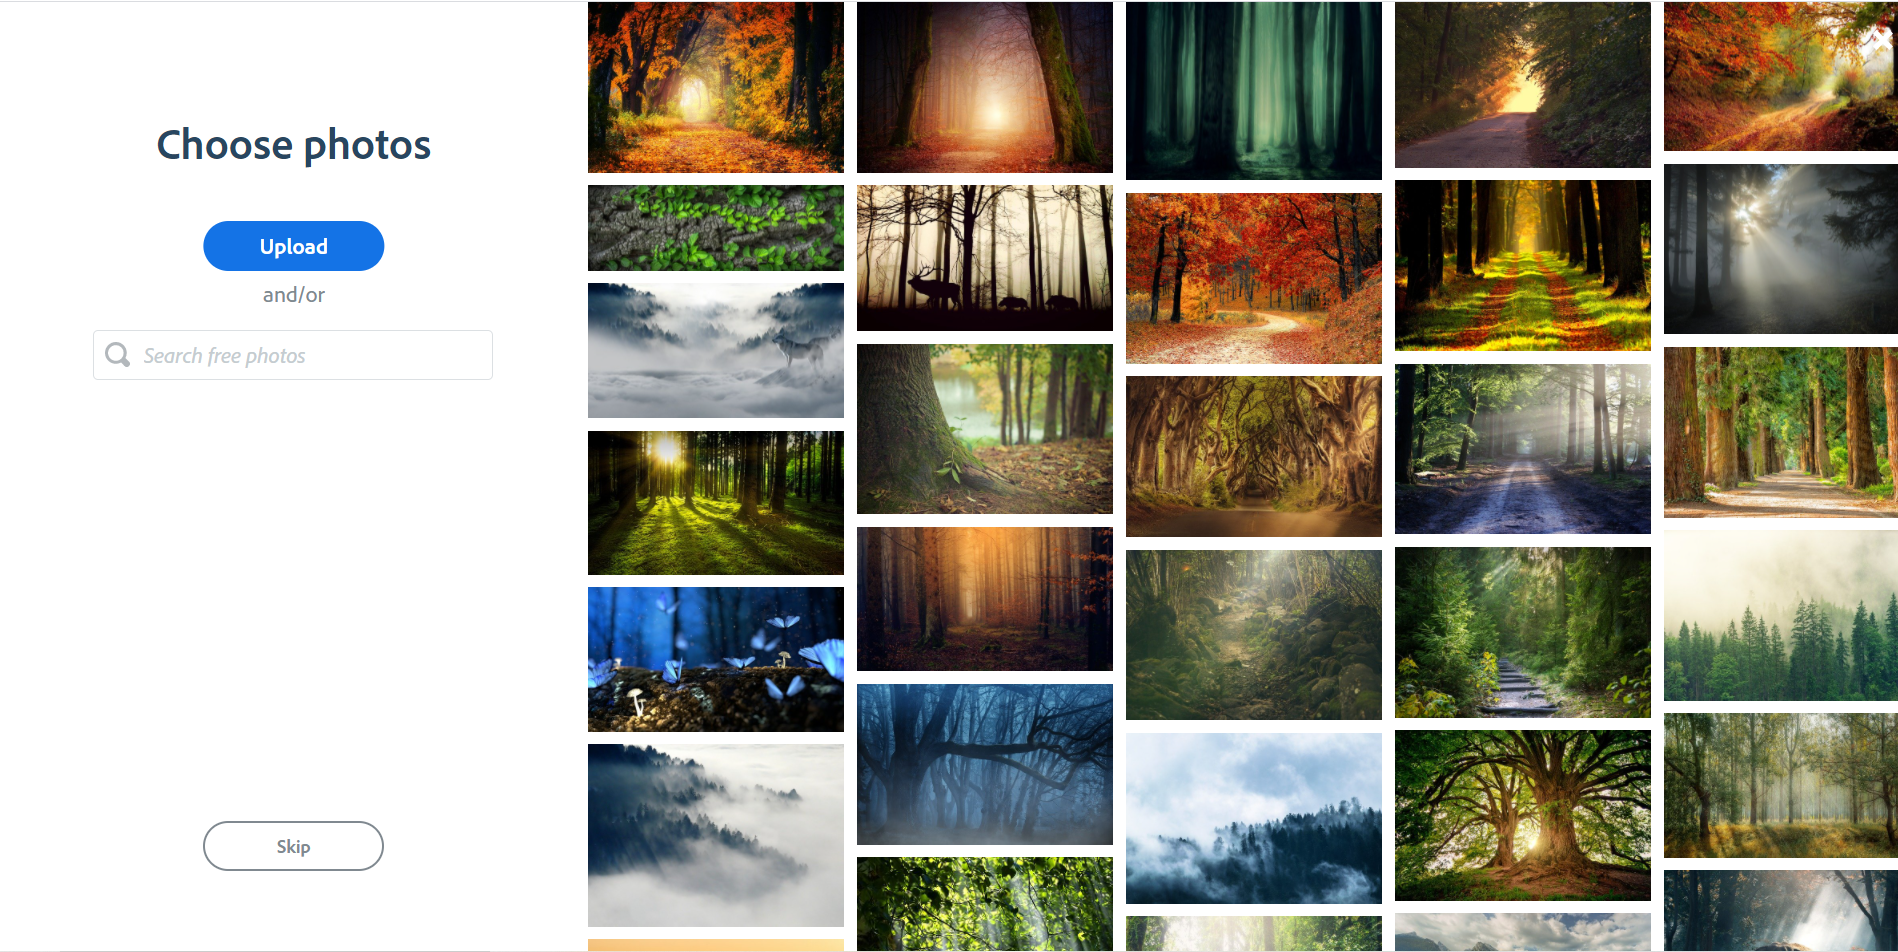
Select the picture and upload it using the upload option, or search for a new template for your photo if you hadn’t got any picture as a base. There are multiple varieties available as base templates. So, select the photo to start. If you have a picture ready or if you want to just let the program auto select hit the skip.
5.Visit the right-side setting for a filter select-
After the selection of the photo, there are many features for enhancing the photo, such as the enhancements, filters, blur, etc. select the filter option for adding a photo filter. There are a decent number of filters available. Some of the filters here include duotone, grayscale, darken, contrast, Matte, lighten, colorize, multiply. To select a filter, just hit the filter button just to activate it, and the filter gets applied. To enhance your image, even more use the other features offered by adobe spark. These features include text insertion features, icons, design assets, backgrounds, logos, and libraries. The main image editing features here include the blur effect, the enhancement mode, etc. After the edits just save your progress and download the photo. There is a share option that links directly to all the social media platforms such as Instagram, Gmail, Facebook, etc. The photo can directly be shared with the media handles directly.
In conclusion, there are many tools that can add different types of filters to our image, but as a user, it all depends on us on how we select our tools to finish our work. There are many apps and softwares that are masking themselves in front of us and stealing our personal info from our devices. Feel free to contact us through our social media handles if there are any doubts/suggestions/ideas to be presented for this post.